jQuery / Reference / .slideDown()

개요

  • .slideDown()은 선택한 요소를 아래쪽으로 서서히 나타나게 합니다.

문법

.slideDown( [duration ] [, easing ] [, complete ] )

duration

  • 요소가 나타날 때까지 걸리는 시간입니다. 단위는 1/1000초, 기본값은 400입니다.
  • fast나 slow로 정할 수 있습니다. fast는 200, slow는 600에 해당합니다.

easing

  • 요소가 나타나는 방식을 정합니다.
  • swing과 linear가 가능하며, 기본값은 swing입니다.

complete

  • 요소가 나타난 후 수행할 작업을 정합니다.

예제 1

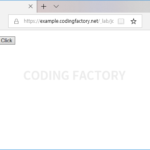
  • 버튼을 클릭하면 파란색 배경의 div 요소가 아래쪽으로 나타납니다.
<!doctype html>
<html lang="ko">
  <head>
    <meta charset="utf-8">
    <title>jQuery</title>
    <style>
      .b { display: none; height: 100px; background-color: #bbdefb; }
    </style>
    <script src="//code.jquery.com/jquery-3.4.1.min.js"></script>
    <script>
      $( document ).ready( function() {
        $( 'button.a' ).click( function() {
          $( '.b' ).slideDown();
        } );
      } );
    </script>
  </head>
  <body>
    <p><button class="a">Click</button></p>
    <div class="b"></div>
  </body>
</html>

예제 2

  • 나타나는 속도를 비교하는 예제입니다. 왼쪽 요소의 나타나는 시간은 400, 오른쪽 요소는 1200입니다.
<!doctype html>
<html lang="ko">
  <head>
    <meta charset="utf-8">
    <title>jQuery</title>
    <style>
      .b { display: none; height: 500px; background-color: #bbdefb; }
      .c { display: none; height: 500px; background-color: #ffcdd2; }
    </style>
    <script src="//code.jquery.com/jquery-3.4.1.min.js"></script>
    <script>
      $( document ).ready( function() {
        $( 'button.a' ).click( function() {
          $( '.b' ).slideDown( 400 );
          $( '.c' ).slideDown( 1200 );
        } );
      } );
    </script>
  </head>
  <body>
    <p><button class="a">Click</button></p>
    <table style="width: 100%; height: 500px;">
      <tr>
        <td style="vertical-align: top;"><div class="b"></div></td>
        <td style="vertical-align: top;"><div class="c"></div></td>
      </tr>
    </table>
  </body>
</html>

예제 3

  • swing와 linear를 비교하는 예제입니다. easing은 가변  속도이고, linear는 고정 속도입니다.
<!doctype html>
<html lang="ko">
  <head>
    <meta charset="utf-8">
    <title>jQuery</title>
    <style>
      .b { display: none; height: 500px; background-color: #bbdefb; }
      .c { display: none; height: 500px; background-color: #ffcdd2; }
    </style>
    <script src="//code.jquery.com/jquery-3.4.1.min.js"></script>
    <script>
      $( document ).ready( function() {
        $( 'button.a' ).click( function() {
          $( '.b' ).slideDown( 2000, 'swing' );
          $( '.c' ).slideDown( 2000, 'linear' );
        } );
      } );
    </script>
  </head>
  <body>
    <p><button class="a">Click</button></p>
    <table style="width: 100%; height: 500px;">
      <tr>
        <td style="vertical-align: top;"><div class="b"></div></td>
        <td style="vertical-align: top;"><div class="c"></div></td>
      </tr>
    </table>
  </body>
</html>

예제 4

  • div 요소가 나타난 후 배경색이 바뀌는 예제입니다.
<!doctype html>
<html lang="ko">
  <head>
    <meta charset="utf-8">
    <title>jQuery</title>
    <style>
      .b { display: none; height: 100px; background-color: #bbdefb; }
    </style>
    <script src="//code.jquery.com/jquery-3.4.1.min.js"></script>
    <script>
      $( document ).ready( function() {
        $( 'button.a' ).click( function() {
          $( '.b' ).slideDown( function() {
            $( this ).css( 'background-color', '#ffcdd2' );
          } );
        } );
      } );
    </script>
  </head>
  <body>
    <p><button class="a">Click</button></p>
    <div class="b"></div>
  </body>
</html>

참고

  • .slideUp()는 선택한 요소를 위쪽으로 서서히 사라지게 합니다.
  • .slideToggle()은 보이지 않는 요소는 아래쪽으로 서서히 나타나게 하고, 보이는 요소는 위쪽으로 서서히 사라지게 합니다.
같은 카테고리의 다른 글
jQuery / Reference / .toggleClass()

jQuery / Reference / .toggleClass()

개요 .toggleClass()로 선택한 요소에 클래스 값을 넣었다 뺐다 할 수 있습니다. 문법 .toggleClass( className ) 예를 들어 다음은 p 요소에 xyz 클래스가 없으면 추가하고, 있으면 제거합니다. $( 'p' ).toggleClass( 'xyz' ); 예제 버튼을 클릭하면 h1 요소에 ab 클래스 값이 추가되어 배경색이 생기고, 다시 버튼을 클릭하면 ab 클래스 값이 제거되어 배경색이 사라집니다. <!doctype html> <html lang="ko"> <head> ...

jQuery / Reference / .insertAfter()

jQuery / Reference / .insertAfter()

개요 .insertAfter()는 특정 요소 뒤에 요소를 추가하거나 이동시킵니다. 문법 .insertAfter( target ) 예제 1 h1 요소 뒤에 <p>World</p>를 추가합니다. <!doctype html> <html lang="ko"> <head> <meta charset="utf-8"> <title>jQuery</title> <style> body { font-family: Consolas, monospace; ...

jQuery / Reference / .slideUp()

jQuery / Reference / .slideUp()

개요 .slideUp()는 선택한 요소를 위쪽으로 서서히 사라지게 합니다. 문법 .slideUp( ) duration 요소가 사라질 때까지 걸리는 시간입니다. 단위는 1/1000초, 기본값은 400입니다. fast나 slow로 정할 수 있습니다. fast는 200, slow는 600에 해당합니다. easing 요소가 사라지는 방식을 정합니다. swing과 linear가 가능하며, 기본값은 swing입니다. complete 요소가 사라진 후 수행할 작업을 정합니다. 예제 1 버튼을 클릭하면 파란색 배경의 div ...

jQuery / Reference / .unwrap()

jQuery / Reference / .unwrap()

개요 .unwrap()은 선택한 요소의 상위 태그를 제거합니다. 문법 .unwrap() 예를 들어 다음은 h1 요소의 바로 상위의 태그를 제거합니다. $( 'h1' ).unwrap(); 예제 버튼을 크릭하면 h1 요소의 상위 태그인 div 태그를 제거합니다. <!doctype html> <html lang="ko"> <head> <meta charset="utf-8"> <title>jQuery</title> <style> div { ...

jQuery / Reference / .remove()

jQuery / Reference / .remove()

개요 .remove()는 선택한 요소를 HTML 문서에서 제거합니다. 문법 .remove( ) 특정 선택자를 가진 요소를 제거할 때는 괄호 안에 선택자를 넣습니다. 예를 들어 다음은 클래스 값으로 rm을 가진 p 요소를 제거합니다. $( 'p' ).remove( '.rm' ); 다음과 같이 해도 결과는 같습니다. $( 'p.rm' ).remove(); 예제 버튼을 클릭하면 rm을 클래스 값으로 가지는 h1 요소를 제거합니다. <!doctype html> <html lang="ko"> <head> ...

jQuery / Reference / .before()

jQuery / Reference / .before()

개요 .before()는 선택한 요소 앞에 새 요소를 추가하거나, 다른 곳에 있는 요소를 이동시킵니다. 문법 .before( content ) 예제 1 p 요소 앞에 Lorem Ipsum Dolor를 내용으로 갖는 h1 요소를 추가합니다. <!doctype html> <html lang="ko"> <head> <meta charset="utf-8"> <title>jQuery</title> <script src="//code.jquery.com/jquery-3.3.1.min.js"></script> <script> ...

jQuery / Reference / .prepend()

jQuery / Reference / .prepend()

개요 .prepend()는 선택한 요소의 내용의 앞에 콘텐트를 추가합니다. 문법 .prepend( content ) 예제 1 순서 없는 목록 처음에 Dolor를 추가합니다. <!doctype html> <html lang="ko"> <head> <meta charset="utf-8"> <title>jQuery</title> <style> body { line-height: ...

jQuery / Reference / .removeClass()

jQuery / Reference / .removeClass()

개요 .removeClass()로 선택한 요소에서 클래스 값을 제거할 수 있습니다. 문법 .removeClass( className ) 클래스 값은 큰 따옴표 또는 작은 따옴표로 감쌉니다. $( 'h1' ).removeClass( 'abc' ); 띄어쓰기로 구분하여 여러 개의 값을 제거할 수 있습니다. $( 'h1' ).removeClass( 'ab cd ef' ); 페이지가 로드된 상태에서 클래스 값이 제거되는 것이므로, 제거되기 전의 모양에서 제거된 후의 모양으로 변하는 것을 방문자가 볼 수도 ...

jQuery / Reference / .wrap()

jQuery / Reference / .wrap()

개요 .wrap()은 선택한 요소를 원하는 태그로 감쌉니다. 문법 .wrap( wrappingElement ) 예를 들어 다음과 같이 하면 p 요소를 div로 감쌉니다. $( 'p' ).wrap( '<div></div>' ); class나 id 값을 추가할 수도 있습니다. $( 'p' ).wrap( '<div id="ab" class="cd"></div>' ); 여러 태그로 감쌀 수도 있습니다. $( 'p' ).wrap( '<div><strong></strong></div>' ); 예제 클래스의 값이 a인 p 요소를 blockquote 태그로 감쌉니다. <!doctype html> <html lang="ko"> <head> ...

jQuery / Reference / .addClass()

jQuery / Reference / .addClass()

개요 .addClass()로 선택한 요소에 클래스 값을 추가할 수 있습니다. 문법 .addClass( className ) 클래스 값은 큰 따옴표 또는 작은 따옴표로 감쌉니다. $( 'h1' ).addClass( 'abc' ); 띄어쓰기로 구분하여 여러 개의 값을 추가할 수 있습니다. $( 'h1' ).addClass( 'ab cd ef' ); 페이지가 로드된 상태에서 클래스 값이 추가되는 것이므로, 추가되기 전의 모양에서 추가된 후의 모양으로 변하는 것을 방문자가 볼 수도 ...